In the previous post, Introduction to Coral Fragging, we talked about the dream that most of us share, to have a thriving reef aquarium, filled with Small Polyp Stony (SPS), Large Polyp Stony (LPS) and Soft Coral species all growing like gangbusters. But you can’t just buy that stuffed tank, you have to grow into it–and one of the most efficient and effective ways to grow into the aquarium of your dreams is to have success fragging the corals that are growing so well in your tank already. If you found this article first and are starting here, you may want to head back and check out the first article in this series.
For an embarrassingly long time, I was afraid to frag my corals. It takes a lot for me to want to admit that to you. I am the author of a #1 Bestselling book in the Aquarium and Fish category, and I have been blogging online about the hobby here since 2009, but when I first started keeping corals in my saltwater aquarium, I wouldn’t even to expose them to the air, let alone carve them up like a Thanksgiving turkey. But after researching, reading and trial and error across many different coral types, I have discovered that fragging for just about any type of coral can be broken down into four stages:
- Conditioning
- Preparation
- Creating the frag
- Attachment
The first two stages occur before you actually frag the coral–you have to condition the coral so that it is in the best possible shape to recover and continue growing vigorously, and you have to prepare your plan and your fragging station before you get started, to make sure you are ready and are able to frag the coral as efficiently as possible.
But the fun really happens in the third and fourth stages, where you actually have to cut the coral and attach it to something. So let’s dive right into things here and review what tools you will need to create that reef-garden full of frags.
Tools for creating the frag
Have you ever heard the cliche, “You have to break a few eggs to make an omelet?” Well, you have to break off a few coral fragments to make a coral frag. This first group of tools is what you need to fragment the majority of popular commercially available coral species. Some of these tools are for cutting, some are for chipping and others are for sawing–the trick is to do your research and figure out which tool will work best for the coral you are interested in fragging. Let’s take a look at each of them.
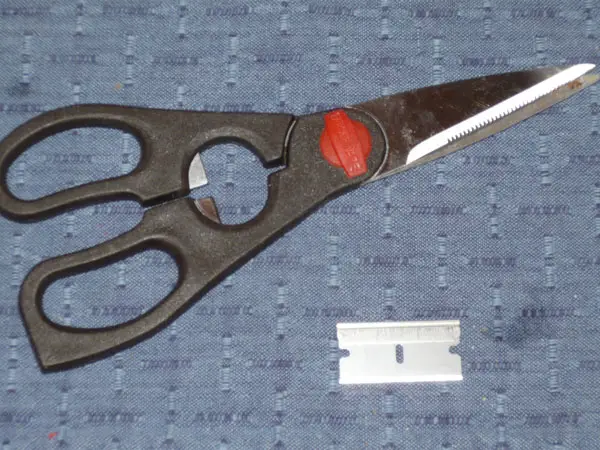
[icon type=”check-square-o”] Razor blade
A razor blade is a great tool for cutting Soft Corals like Mushroom Corals (Corallimorphs) that have short stalks with broad-headed polyps that grow close to the rockwork. With a quick, steady slicing motion, you can slice a mother colony into two fragments.
[icon type=”check-square-o”] ScalpelA scalpel is a tool that was designed to be used in surgeries and dissections. It works great for fragging corals, too.A scalpel has all the advantages of a razor blade paired with a sturdy handle to help to make clean cuts even easier.
[icon type=”check-square-o”] Stainless steel scissorsStainless steel scissors are an incredibly popular fragging tool–and for good reason–they make cutting Soft Corals a breeze. Scissors use a ‘pinch-and-cut’ technique. While super-quick and easy-to-do, the pinch part of the pinch-and-cut technique can sometimes damage the area of the coral at the site of the cut. If there was a delicate coral species where I was worried about bruising, for example, I would use a razor blade or scalpel instead of scissors…
[icon type=”check-square-o”] Wire cuttersYou probably have this ubiquitous tool sitting in your toolbox. It was designed to cut and strip electrical wires–but it is also a beautifully designed tool that can help you cut (or pinch and break) thinly branched Stony Coral species. I don’t recommend you actually use that set of wire cutters in your toolbox. I recommend you get a shiny new pair and keep them surgically clean. But when you just need to clip a small, branching Stony Coral, wire cutters are the tool for the job.
[icon type=”check-square-o”] Bone cuttersBone cutters are essentially heavy-duty wire cutters (another surgical instrument) designed to snap bones instead of wires. Bones are mineralized calcium phosphate, coral skeletons are calcium carbonate. In short, bone cutters are also coral cutters and are the perfect tool for cutting any branching Stony Coral species–especially when the branches are too thick to cut with wire cutters.
[icon type=”check-square-o”] ScrewdriverIf you have to pry a small piece of rock loose or get under the mat of a coral-like a Green Star Polyp, you might need a screwdriver. In a pinch, you can also use your screwdriver as a chisel.
[icon type=”check-square-o”] ChiselLine up your chisel in between coral polyps on a piece of live rock and give it a hard tap with a hammer and watch the relatively lightweight live rock bust up into pieces.
[icon type=”check-square-o”] Rotary Tool (Dremel brand or other)A Dremel is a specific brand of a small, hand-held rotary tool. This basically means it is a motor attached to a spinning wheel–and you attach awesome things to the spinning wheel to do different tasks. Properly equipped, a rotary tool is a portable, handheld sawing machine that gives you complete control over the exact size and shape of the cut.
[icon type=”check-square-o”] Band sawIf you are a gadget geek, or if you plan on making lots and lots of frags from Stony Coral colonies, you may want to invest the money into a band saw. I actually don’t own one, but whenever I see how quickly and easily they zip through coral colonies I’m always amazed. These saws will quickly cut through anything, including your fingers, so be very, very careful.
Tools for attaching
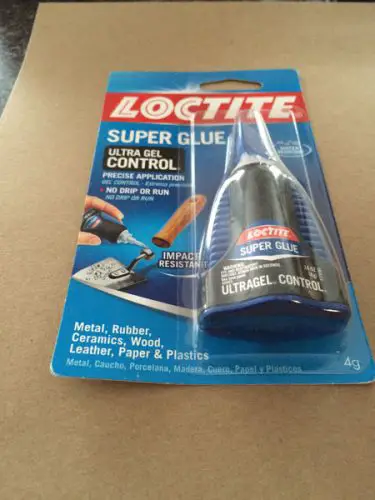
Cyanoacrylate glue (gel) is one of the most popular tools used when fragging corals. Don’t be intimidated by the fancy name cyanoacrylate, because you can find this product in stores everywhere, sold under the “SuperGlue” and “KrazyGlue” brands. Cyanoacrylate glue is reef-safe and easy to use. Just dab it on a frag or piece of live rock, hold the coral in place for a second or two and give it a few minutes to set.
[alert type="muted" close="false" heading="Quick tip"] Buy SuperGlue gel instead of regular SuperGlue.
The gel is thicker and much easier to use.[/alert]Another popular coral fragging tool and an alternative to glue is something called two-part epoxy. Inside the tube, the two parts don’t mix and don’t react, but when you cut off a portion and knead it with your fingers, the chemical energy comes to life and you have a reef-safe product that can help you bond a coral or two pieces of rock together in just a few minutes.
[icon type=”check-square-o”] Rubber bandsRubber bands are an alternative to glue and work great for the soft-bodied Leather corals. Leather corals are notoriously difficult to glue into place. Their slime coat protects them from the glue and they often slip away (somehow) from the grasp of the sticky glue. Rubber bands are sometimes effective at holding slimy coral frags in place.
[icon type=”check-square-o”] Plastic container and meshSave that plastic container from the pre-packaged deli meat or cool-whip, in addition to the mesh that your oranges, grapefruits and clementines come in for your coral fragging. You can use this in the Plastic Container and Mesh method.
[icon type=”check-square-o”] Live rock rubble and frag plugsLive rock rubble is usually my fragging substrate of choice. It’s the diminutive cousin of live rock. It looks natural, comes in various sizes and is great for attaching corals. The only downside of live rock rubble is that the shape can be irregular–which can lead to falling frags if not properly bonded into place.
Frag plugs are a great alternative to live rock rubble. Frag plugs are stony-looking products manufactured specifically to be used for mounting coral frags.
[icon type=”check-square-o”] Plastic toothpicksIf you are fragging one of the more challenging Soft Coral species and are having difficulties getting the coral to attach, you may need to try the Impaling method, and you need plastic toothpicks.
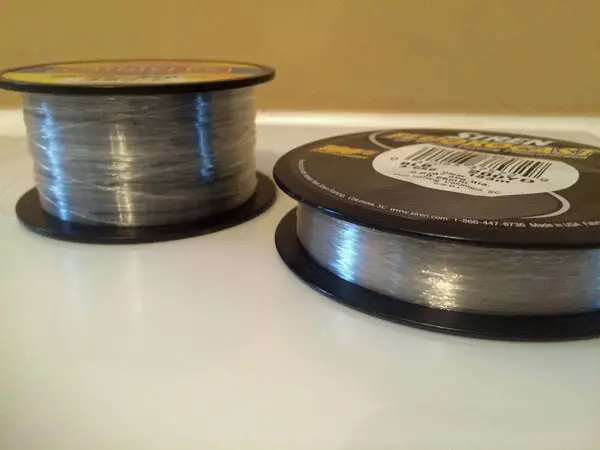
[icon type=”check-square-o”] Fishing line and a sewing needleFishing line is another versatile material you can use to attach corals. There are advantages and disadvantages to using the fishing line. On the advantages side, you can tie the fishing line as tight or as loose as you want. A disadvantage, however, is that it can be difficult to get the tension (and tie a knot) just right.
Tools for safety

Safety should always be a top priority. Some coral species are known to release a harmful chemical called palytoxin. You don’t want that on your skin. It is generally best to wear disposable gloves when fragging corals.
[icon type=”check-square-o”] Safety gogglesSafety goggles are another essential piece of equipment for fragging corals and help prevent stuff from accidentally getting into your eyes.
If you had to start out with just a few
I realize that I just gave you a pretty long list of tools for fragging. I hope you’re not about to tell me that you’re not interested in starting a new tool collection and you want me to go for a long walk off a short pier.
Please don’t be overwhelmed by this list. You don’t need all of these tools to get started. You can start out small, like I did, and expand as you go along.
Here is the shortlist of tools that you need:
- Safety goggles and gloves
- Pack of razor blades
- Plastic container and mesh
- Wire cutters
- Cyanoacrylate glue gel
With this shortlist of tools, you will be able to frag a Mushroom Coral, just like I will show you in the third article in this series.
Coral fragging boiled down to 11 techniques
What I have learned, from years of experience and reading and writing about the saltwater aquarium hobby, is that most of the popular corals can be successfully fragged by using one of the various combinations of 11 techniques–five fragment creating techniques and six attachment techniques.
[counter num_start=”0″ num_end=”11″ num_speed=”1000″ num_color=”#272727″ text_below=”11 Techniques:”]
Creating the fragment
Technique # 1: Chipping method
The Chipping method is a fairly straightforward technique. Tap the chisel with a hammer to break apart a piece of live rock With large polyped corals like Zoanthids, Mushroom Corals, Xenia, and Capnella species, you can use this method to frag the corals without ever having to cut the actual coral itself.
Technique #2: Snapping method
The Snapping method is also easy to execute and is best used for Small Polyp Stony Corals or the branching varieties of Large Polyp Stony Corals with relatively thin branches. Using wire cutters or bone cutters, squeeze the handle and twist to snap off a branch or plate.
Technique # 3: Shearing method

Shearing is a great technique to frag soft-bodied Leather Coral species like Devil’s Hand, Finger Coral, Cabbage Leather, Capnella, and Xenia, just to name a few. You can use scissors, and the shearing method, to cleave off a branch or lobe of most soft coral species.
Technique # 4: Slicing method
The Slicing method is the technique of choice for these harder-to-cut Soft Coral species. Scissors/shears are fast but clunky, but razor-sharp scalpels and razor blades are perfect for those trickier jobs.
Technique # 5: Sawing method
For Stony Corals that have branches too thick to snap, or for the Favia and acan growth forms, the only way you are going to be able to get in there and make a frag is by literally sawing through the coral’s skeleton. That takes some courage, a steady hand, and some serious confidence.
Chipping, snapping, shearing, slicing and sawing sound like things you would see in a horror film, but they represent the not-so-scary steps to fragging most coral species.
Attaching techniques
After you make the cut, most corals need to be attached to a substrate. In this next section, I will show you the 6 techniques you need to know in order to master fragging for just about any coral species.
Technique # 6: Slow Creep method
The easiest method for attaching coral frags is the Slow Creep method. If you are growing an encrusting coral species, like Green Star Polyps, Xenia or Zoanthids, you will notice that they seem to creep along the rockwork and reproduce on their own. For this method, all you do is take a frag plug or small piece of live rock rubble and place it at the base of the encrusting coral in the direction the coral is spreading. Within a few days, the coral will begin to grow on the obstacle you put in its path.
Technique # 7: Plastic Container and Mesh method
The plastic container and mesh method is best used for slippery, slimy Soft Coral species you can’t hold in place with either the Glue method or the Rubber Band method.
Here is how the Plastic Container and Mesh method works. You place some live rock rubble in a small plastic container along with your frags and cover it with the plastic mesh. In a few days, the corals will attach to the rubble all on their own.
Technique # 8: Glue method
The Glue method is a popular method to attach corals that won’t slime their way off of the frag plug. Place a dab of superglue gel on the frag plug or live rock you want to attach the frag to. Dab the frag dry on a paper towel. Press and hold the frag in place for about 30 seconds.
Technique # 9: Impaling Method
If you are fragging one of the slimy, leathery, difficult-to-attach coral species, like one of the Toadstool species, or even, perhaps, a Mushroom Coral, and you absolutely have to have it attached to a specific rock or frag plug, then you may want to try to attach these corals using an impaling method.
For those corals that are too slimy to glue or attach with a rubber band, you can try to attach the frag to your substrate of choice by impaling the frag on a plastic toothpick and attaching the toothpick to the rock or frag plug with rubber bands or glue.
Technique # 10: Rubber Band method
This technique is great for attaching many of the slime-producing Leather coral species (Devil’s Hand, Finger Leather, Toadstool, Toadstool, Xenia). When using the Rubber Band method, try to pick an irregularly shaped piece of live rock and rest the frag in a depression on that live rock, using the rubber band to secure it in place there.
Technique # 11: Fishing Line method
The fishing line method is probably the most difficult attachment method to master, because you have to master not one, not two, but three skills. The fishing line method is appropriate for the trickiest of corals (I’m looking at you, when I type this, oh slimy coral species!). You start by tying monofilament line to a sewing needle with a small knot. You then use the sewing needle to impale the coral and pull the needle all the way through the coral so that the fishing line is running through it. Next, tie the monofilament around a small piece of live rock.
[alert type="muted" close="false" heading="Quick tip"] Use the thinnest diameter needle and monofilament fishing line you can find. Fishing line is rated in "lb test".
The lower the number, the thinner the line--so 4 lb test is thinner than 8 lb test. [/alert]
Taking the next step: putting what you have learned into action
You are on a journey to learn a skill that will help you create the aquascape of your dreams. In the third article in this series, I will help you visualize just how easy it is to frag your first coral, and take the next step, as I show you the process of fragging a Mushroom Coral, step-by-step.
Are you interested in learning more, but are still squeamish, or doubtful that you will be able to take a razor blade to a coral and actually make the frags? That’s ok, I will also tell you what types of corals you can buy so that you don’t actually have to cut the coral–a few popular species will actually frag themselves.
To be continued on the next post…
[icon type=”check-square-o”] Please leave a comment below and let’s have a discussion
[icon type=”hand-o-down”]
What do you think about the series so far? What questions do you have that haven’t been answered yet?
Leave a Reply